Today we were practicing a new technique: frilling. Frilling is basically making ruffles using the bulp tool. For making ruffles you need fondant that can take some rough handling. So the basic fondant has to be mixed with some tylo powder to make a 50% mixture. For an 100% fondant mix I used 250 grams of fondant mixed with 4 gram of tylo powder. This can be mixed with 50% basis fondant to get an 50% mixture or you can take 250 grams of fondant and mix it with 2 grams of tylo powder.
For the ruffles we used the garrett frill cutter. This is an oval cutter and if you open the oval up you will get some ruffles already but to make them extra pretty the bulp tool is used to thinner the edges and make it more wavy.
This time we used a dummy cake for practicing the technique. We also baked a real cake for next weeks lesson.
I stared with coloring the fondant and rolling it out big enough to cover the sides of the dummy cake. Then I used a mold to make a pretty pattern.
I also covered the top of the dummy and used a crimper to add the sides together. For the decoration on the top I used different molds to give it a nice effect.
Then it was time to make ruffles. I always wanted to make an ombre cake. This is a cake with different shades of the same color. I stared with a dark blue ruffle and to the fondant I had left I add the same amount of white fondant. Then I made another ruffle and add the same amount of white fondant to the left over fondant. This went on for 5 times. The effect was very pretty, but the different shades were not that easy to see. So next time I would add two times white to one time color.
I also made a curtain to cover the part where the fondant came together. As you can see I had no clue how to make a curtain yet.
I had lots of fun making this cake, but the ruffles takes a lot of time to make.
15 March 2015
13 February 2015
Blondies vs Brownies
It's been a while since I made blondies and brownies so for my friends birthday I decided to make both and pack it in a cute box.
For the blondies I used:
- 200 gr light brown sugar
- 200 gr room temperature butter
- 200 gr chopped white chocolate
- 175 gr eggs (about 3 large ones)
- 200 gr flour
- pinch of salt
- vanilla sugar
- 125 dried cranberries
oven temperature 170C
I started with melting the butter and to that I added about 50 grams of chopped white chocolate.
Then I mixed the sugar with the eggs till it was creamy and I mixed in the rest of the ingredients, cranberries last.
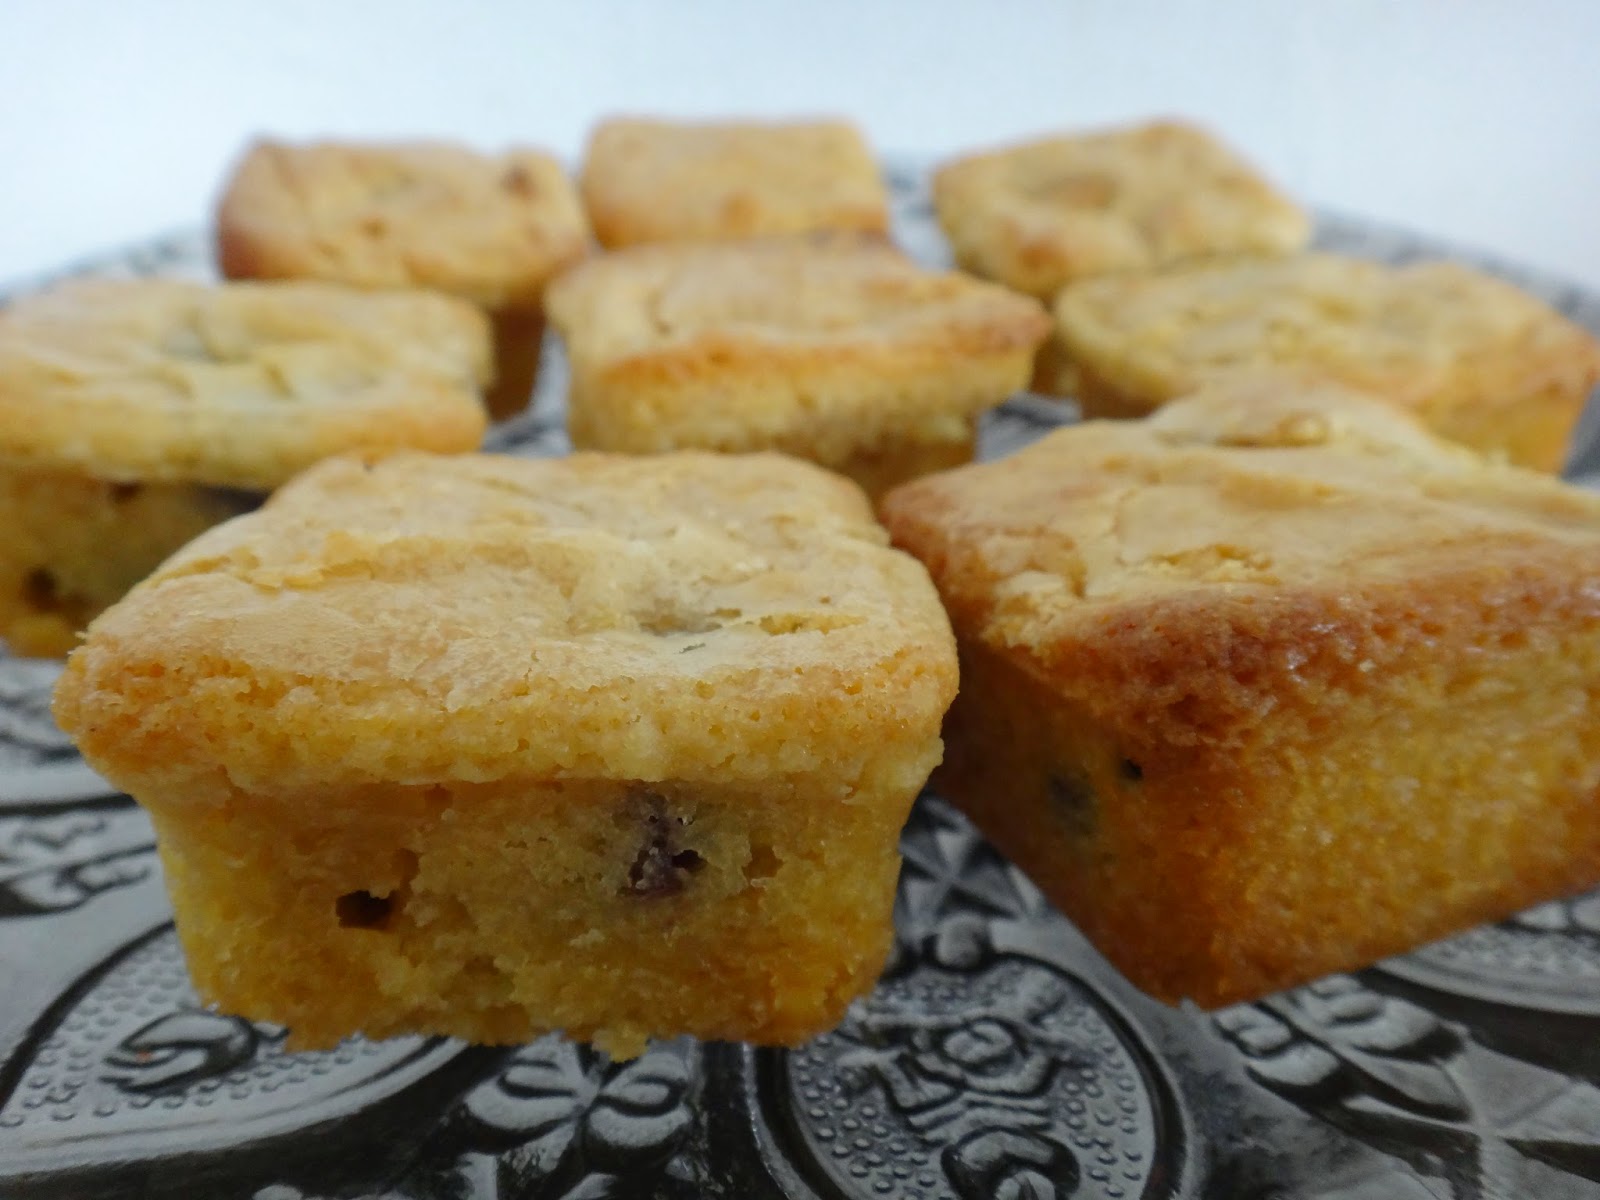
Since I have this nice brownie mold I brushed it with some melted butter and scooped some of the blondie mixture in.
I baked them for about 25 minutes, more or less and they came out perfect. The cranberries gave it a nice extra touch.
For the brownie I used:
- 200 gr melted butter
- 300 gr dark chocolate
- 280 gr flour
- pinch of salt
- 2 eggs
- 180 gr sugar
- vanilla sugar
- 2 teaspoons of instant coffee
- 100 gr chopped walnuts
oven temperature 170C
First I melted the butter with the dark chocolate. Then in a different bowl I mixed the eggs, the sugar, vanilla sugar and the instant coffee. To this I added the melted chocolate and mixed in the flour and salt. Last the walnuts were added.
I baked them for about 25 minutes and they were kinda overdone. Still had lots of flavor but not as chewy as they should be. I think 15-20 minutes would be better.
08 February 2015
Modeling fondant
Talking about how fast time goes. We just finished the first lesson of the fifth phase of this course and we are back at cake decorating. It's time to get creative again!
We were asked to bring a picture of whatever we wanted to make with us so we could start practicing modeling fondant. For those who didn't bring one there was one available in class. As I didn't had a printer available I used the picture they had in class.
We all got our own bucket of fondant for this phase and we started with a short explanation of what to expect in the next 5 lessons. Then we could go all out on the picture. We could use whatever they had available.
This is the first time I worked with some of the materials, like fondant crimpers, several molds and tylo powder.
Tylo powder is a synthetic (man made) equivalent of gum tragacanth. We used it to make modeling paste by kneading 4 or 5 grams of tylo powder to 250 grams of fondant. This modeling paste will be our basic. From this we can add other ingredients depending on the purpose of the fondant.
It's also possible to make our own fondant by adding some tylo powder to some royal icing. This is very helpful to know because if you are in a hurry you can make it yourself instead of running to the store and buy some.
Tylo powder also used to make edible glue by adding it to some water and let it slowly dissolve.
I started with adding some blue color to the fondant. When the fondant had the color I wanted I rolled it out. The picture I got in class was used as a mold. I cut out most of the elements and placed them on the fondant. I cut out the hart shapped back ground and used a mold to put a pattern on. Then I made the frame and used a crimper to shape it a bit.
I decided to keep the guys jacket white and give the girl a fancy old pink colored dress. To make it a bit fancier I put on some gold accents.
Then I made the arms and heads. I'm not a fan of blond so both got brown hair. This color wasn't easy to make and it took me several attempts to get the girl's color right.
I just love to add extra details to make it stand out so the girl's dress didn't had a sleeve but a very thin string and she got some lipstick on.
Then because it is very difficult to shape a hand I decided to hide it in a bunch of yellow roses.
This was a very slow class, but it was nice because we could go all out with modeling the fondant. It reminded me of when I was young and we used play dough to make stuff. I just wish I played with it more. Imagine what I could be making now!
We were asked to bring a picture of whatever we wanted to make with us so we could start practicing modeling fondant. For those who didn't bring one there was one available in class. As I didn't had a printer available I used the picture they had in class.
We all got our own bucket of fondant for this phase and we started with a short explanation of what to expect in the next 5 lessons. Then we could go all out on the picture. We could use whatever they had available.
This is the first time I worked with some of the materials, like fondant crimpers, several molds and tylo powder.
Tylo powder is a synthetic (man made) equivalent of gum tragacanth. We used it to make modeling paste by kneading 4 or 5 grams of tylo powder to 250 grams of fondant. This modeling paste will be our basic. From this we can add other ingredients depending on the purpose of the fondant.
It's also possible to make our own fondant by adding some tylo powder to some royal icing. This is very helpful to know because if you are in a hurry you can make it yourself instead of running to the store and buy some.
Tylo powder also used to make edible glue by adding it to some water and let it slowly dissolve.
I started with adding some blue color to the fondant. When the fondant had the color I wanted I rolled it out. The picture I got in class was used as a mold. I cut out most of the elements and placed them on the fondant. I cut out the hart shapped back ground and used a mold to put a pattern on. Then I made the frame and used a crimper to shape it a bit.
I decided to keep the guys jacket white and give the girl a fancy old pink colored dress. To make it a bit fancier I put on some gold accents.
Then I made the arms and heads. I'm not a fan of blond so both got brown hair. This color wasn't easy to make and it took me several attempts to get the girl's color right.
I just love to add extra details to make it stand out so the girl's dress didn't had a sleeve but a very thin string and she got some lipstick on.
Then because it is very difficult to shape a hand I decided to hide it in a bunch of yellow roses.
This was a very slow class, but it was nice because we could go all out with modeling the fondant. It reminded me of when I was young and we used play dough to make stuff. I just wish I played with it more. Imagine what I could be making now!
29 January 2015
Friandises
At home I wrote out a whole game plan of what I wanted to make, what I needed for it and how it would do it. Turned out that things didn't totally went as planned. I was expecting the ingredients to be centralized available, but they were all over the place so it took some to find what I needed.
The game plan was:
- a lemon meringue pie with raspberry
- a lemon mousse ball covered with lemon glaze
- a lemon raspberry mousse on an almond cake
- an apple and lemon pie
I manage to execute two out of four since I was running out of time.
First I started with making two different kinds of dough for my pies.
For the lemon meringue pie I used a shortcrust pastry which normally would be made by 1 part sugar, 2 parts butter and 3 parts of flour.
The recipe I used was:
- 80 gr sugar
- 80 gr light brown sugar
- 210 gr butter
- 290 gr flour
- 8,5 gr baking powder
- 2 gr salt
- teaspoon of lemon zest
- 20 gr egg yolk (or just 1)
oven temperature 180 C
I just mixed everything together and let the dough chill in the fridge.
On the bottom of this pie I piped a mixture of 30 grams of marzipan loosen up with a dash of water and 125 grams of crème pâtissière. After baking I put a little bit of lemon curd in the pie, a bit of lemon curd whipped cream and one fresh raspberry. Then I piped some meringue and used a torch to give it a bit of color.
Then for the apple and lemon pie I needed to make "sloffendeeg". I honestly don't know what this dough is called in English, but pies made with this dough are buttery, slightly chewy and soooo good.
I used:
- 180 gr butter
- 170 gr light brown sugar
- 2 gr salt
- 1 egg yolk
- teaspoon lemon zest
- 250 gr flour
- 10 gr baking powder
oven temperature 160C but 170-180C is not a problem either
I mixed together all the ingredients and then add the sifted flour and baking powder last. This dough also has to be chilled in the fridge.
For this pie I used a frangipane made by:
- 125 gr almond paste
- teaspoon lemon zest
- 25 gr butter
- 37 gr egg (or 1 egg)
I mixed all the ingredients and poured it in a piping bag.
Then I cubed two apples, mixed them with some "spekkoekkruiden" (a mixture of several spices) since I couldn't find any cinnamon and head them up a bit so they could soften.
Then I went and made some lemon curd using my trusted recipe:
- 100 gr butter
- 200 gr sugar or more or less depending on taste
- 300 ml fresh lemon juice
- teaspoon lemon zest
- 2 whole eggs + 2 egg yolks
- pinch of salt
Mix everything together, cook till it thickens and chill in the fridge till needed. Very simple and almost fool proof recipe.
Then I also went and make some crème pâtissière:
- 250 ml milk
- 50 gr sugar
- 1 egg yolk
- 22,5 gr custard powder
- vanilla pot/essence/sugar
- pinch of salt
I started cooking the milk with some sugar. The rest of the sugar I mixed with the egg yolk, the custard powder, salt and vanilla. When the milk boils I poured some on the egg mixture to loosen it up and to elevate the temperature so I don't end of with scrambled eggs. Then the whole mixture went back in the pan to cook for a couple of minutes.
After all this mise and place I started with making the apple lemon pies first. I used this round shallow pie mold and placed the dough and stuffing in. Unfortunately there was to much dough and the pies came out way to big and not evenly cooked. So I couldn't serve that. I had to use a mold with smaller cavities.
Because I had to start all over I didn't had time for the mousse ball and mousse cake. Luckily I wrote down another recipe just in case I needed a back up plan.
I had some apple left I decided to apple almond cakes using this recipe:
- 30 gr flour
- 80 gr almond flour
- 100 gr browned butter
- 150 gr icing sugar
- 95 gr egg whites
- pinch of salt
oven temperature 200C
I beaded the egg whites till soft peeks and mix the rest of the ingredients together. Then I folded it into the egg white, poured the batter in the molds and topped them with some cubes of apple.
Since I had some batter and apples left, I mixed them together and poured it into a different shape mold. This time I sprinkled some almond slivers on top to give them a bit of crunch.
I had just enough time to decorate my friandises. I used a mixture of lemon curd and whipped cream and piped a dot on the apple almond cake. Then I sprinkled some chopped pecan nuts on top and decorated it with some white chocolate.
The other apple almond cake already had some slivers of almond on top so all it needed was a bit of white chocolate to make it fancy.
For the apple and lemon pie the teacher suggested to put a thin piece of apple on top. I also added two dollops of lemon curd whipped cream to give it a bit of freshness. Also I think a sprinkle of powdered sugar would take it to the next level. Idea for next time.
I loved working on the lemon meringue pie. At first I wanted to pip the meringue all over the raspberry as well so you have a little surprise biting into one. But I think this looks pretty as well.
At the end I ended up with four friandises that were complimenting each other in looks and taste. It was a lot of stress and hard work, but totally worth it since my plate was picked by one of the teachers as one of two of her to got to plate!
25 January 2015
Oscar cake by Rudolph van Veen
At the end of last weeks class we were told that we would recreate this cake made up by Rudolph van Veen (a well known Dutch chef and patissier) for the Oscars in 2005 hence the name Oscar cake. We would only get the recipe and had to figure the rest out ourselves. Luckily we could watch Rudolph make the cake online so the smart ones (like me hahah) did that. I even went beyond that by testing the recipe at home first.
His recipe was for 2 cakes, but since I'm just testing the recipe I only used half the recipe. As this cake is build up in layers the recipe will be as well.
For the almond cake layer I used:
- 58 gr almonds
- 58 gr sugar
- 75 gr eggs
- 50 gr egg white
- 7 gr sugar
- 10 gr melted butter
- 12 gr flour
oven temperature 220C
First I grounded 58 grams of almonds with 58 grams of sugar. Then I beat the egg white with 7 grams of sugar till it had soft peeks. To the almond mixture I added the eggs, the melted butter and the flour and fold this into the egg whites.
I spread the mixture on some baking paper and baked it in the oven for 10-12 minutes. After that I took it off the baking tray, pulled the baking paper off and let it cool.
For the coffee syrup I used equal part of coffee and sugar and added a dash or two coffee liqueur.
The original recipe called for 1 cup of coffee and 1 cup of sugar, but this is way to much for this recipe so I made just enough to dip the almond cake in.
For the caramelized hazelnuts I used:
- 25 gr sugar
- 15 gr butter
- 50 gr hazelnuts
If you heat the sugar and the butter on low temperature you can put both in a pot at the same time. When the mixture has a caramel color you can add the hazelnuts. If you melt the butter first and then add the sugar you will not be able to mix it all together for a nice caramel so the proper way to do it is to melt the sugar first. When that browns add the butter and mix it before you add the hazelnuts.
I poured this mixture on some baking paper to let it cool. When it cooled I chopped them in rough pieces.
For the cake I used 4 cake molds of 9 cm and there was enough left for 2 smaller cakes, which I don't know the size of.
With the cake molds I pressed out the bottom of the almond cake and a smaller piece for in the middle. Both pieces of cake were then brushed with the coffee syrup. On the bottom I sprinkled some chopped caramelized hazelnuts.
Now for the chocolate mousse layer I used:
- 63 gr water
- 63 gr sugar
- 125 gr pure chocolate
- 75 gr egg yolk
- 3 sheets of gelatin soaked in water
- 450 gr whipping cream whipped to soft peeks
In the movie Rudolph just boiled the water and sugar and added that to the egg yolk whisking it till it was fluffy. So that's what I did at home and it worked somewhat ok.
In class we were told to heat the water and sugar till 121C and then added it to the yolk. The first time we did it,we tried to whisk it by hand but the sugar clumped together so it didn't work. The second time we used the stand mixer and slowly added the syrup which resulted in a very fluffy mixture. However we didn't heat the syrup to 121C. I think it was only a bit higher then 100C.
Then I melted the chocolate and melted the gelatin sheets. To the egg mixture I mixed in the chocolate, the gelatin and fold this into the whipped cream.
I filled half the cake molds with the mouse, put a layer of almond cake in the middle and filled it up till the rim. After I did this with all the molds I put them in the freezer. The cakes will have to be frozen when I pour the chocolate glaze on. With bigger cakes it can take a whole day, but since I made small ones, it only took a couple of hours.
For the chocolate glaze I used:
- 140 gr water
- 180 gr sugar
- 130 gr whipping cream
- 60 gr cocoa powder
- 3 sheets of gelatin soaked in water
In a pan I put all the ingredients (except for the gelatin) and let the mixture cook for about 10 minutes. It is ready when the back of your spoon is well coated. Then I added the gelatin and mixed it well so the gelatin dissolves. This mixture has to be brought back to around 35-40C before I could pour it over the cakes.
To get an evenly cover it is important to pour the glaze on the edges of the cake and not in the middle. Since the cakes are frozen the glaze will immediately set.
Then it is possible to decorate the cake with whatever you want, but since I want the decoration to match the inside of the cake I used some grounded caramelized hazelnuts. It's also a good way of masking the rough edges on the bottom of the cake.
It was a great experience making this cake. I have all kinds of idea's on how to make a spin off using these techniques. But first I have to come up with 4 different kinds of friandises for next class.
His recipe was for 2 cakes, but since I'm just testing the recipe I only used half the recipe. As this cake is build up in layers the recipe will be as well.
For the almond cake layer I used:
- 58 gr almonds
- 58 gr sugar
- 75 gr eggs
- 50 gr egg white
- 7 gr sugar
- 10 gr melted butter
- 12 gr flour
oven temperature 220C
First I grounded 58 grams of almonds with 58 grams of sugar. Then I beat the egg white with 7 grams of sugar till it had soft peeks. To the almond mixture I added the eggs, the melted butter and the flour and fold this into the egg whites.
I spread the mixture on some baking paper and baked it in the oven for 10-12 minutes. After that I took it off the baking tray, pulled the baking paper off and let it cool.
For the coffee syrup I used equal part of coffee and sugar and added a dash or two coffee liqueur.
The original recipe called for 1 cup of coffee and 1 cup of sugar, but this is way to much for this recipe so I made just enough to dip the almond cake in.
For the caramelized hazelnuts I used:
- 25 gr sugar
- 15 gr butter
- 50 gr hazelnuts
If you heat the sugar and the butter on low temperature you can put both in a pot at the same time. When the mixture has a caramel color you can add the hazelnuts. If you melt the butter first and then add the sugar you will not be able to mix it all together for a nice caramel so the proper way to do it is to melt the sugar first. When that browns add the butter and mix it before you add the hazelnuts.
I poured this mixture on some baking paper to let it cool. When it cooled I chopped them in rough pieces.
For the cake I used 4 cake molds of 9 cm and there was enough left for 2 smaller cakes, which I don't know the size of.
With the cake molds I pressed out the bottom of the almond cake and a smaller piece for in the middle. Both pieces of cake were then brushed with the coffee syrup. On the bottom I sprinkled some chopped caramelized hazelnuts.
Now for the chocolate mousse layer I used:
- 63 gr water
- 63 gr sugar
- 125 gr pure chocolate
- 75 gr egg yolk
- 3 sheets of gelatin soaked in water
- 450 gr whipping cream whipped to soft peeks
In the movie Rudolph just boiled the water and sugar and added that to the egg yolk whisking it till it was fluffy. So that's what I did at home and it worked somewhat ok.
In class we were told to heat the water and sugar till 121C and then added it to the yolk. The first time we did it,we tried to whisk it by hand but the sugar clumped together so it didn't work. The second time we used the stand mixer and slowly added the syrup which resulted in a very fluffy mixture. However we didn't heat the syrup to 121C. I think it was only a bit higher then 100C.
Then I melted the chocolate and melted the gelatin sheets. To the egg mixture I mixed in the chocolate, the gelatin and fold this into the whipped cream.
I filled half the cake molds with the mouse, put a layer of almond cake in the middle and filled it up till the rim. After I did this with all the molds I put them in the freezer. The cakes will have to be frozen when I pour the chocolate glaze on. With bigger cakes it can take a whole day, but since I made small ones, it only took a couple of hours.
For the chocolate glaze I used:
- 140 gr water
- 180 gr sugar
- 130 gr whipping cream
- 60 gr cocoa powder
- 3 sheets of gelatin soaked in water
In a pan I put all the ingredients (except for the gelatin) and let the mixture cook for about 10 minutes. It is ready when the back of your spoon is well coated. Then I added the gelatin and mixed it well so the gelatin dissolves. This mixture has to be brought back to around 35-40C before I could pour it over the cakes.
To get an evenly cover it is important to pour the glaze on the edges of the cake and not in the middle. Since the cakes are frozen the glaze will immediately set.
It was a great experience making this cake. I have all kinds of idea's on how to make a spin off using these techniques. But first I have to come up with 4 different kinds of friandises for next class.
18 January 2015
Macarons and petit fours
Since I started with this baking course there are lots of things that I've been doing for the first time and it's been so much fun.
Today we were making macarons and petit fours. We started with a macaron master class. After that we were on our own.
First we had to make a batch of butter cream. Although I've made it several times at home I couldn't get it right in class. At home I use room temperature butter and in class the butter was still cold. So the timing should be spot on to get a smooth butter cream. I added the butter in a bit too late so my cream wasn't as smooth as it should be but the taste was good. Just to give it more flavor we added a dash or two orange liqueur. Also I used less sugar then the recipe called for since I don't like it that sweet.
Today we were making macarons and petit fours. We started with a macaron master class. After that we were on our own.
First we had to make a batch of butter cream. Although I've made it several times at home I couldn't get it right in class. At home I use room temperature butter and in class the butter was still cold. So the timing should be spot on to get a smooth butter cream. I added the butter in a bit too late so my cream wasn't as smooth as it should be but the taste was good. Just to give it more flavor we added a dash or two orange liqueur. Also I used less sugar then the recipe called for since I don't like it that sweet.
After making butter cream we each got a piece of cake for our petit fours. The petit fours were quite easy since the cake was pre-made and all we had to do was fill it with jam or butter cream, put a layer of almond paste on top and dip it in some fondant. It was a piece of cake. To bad we could't bake our own cake, but I guess there wasn't enough time for it.
First we cut it in half so we could spread some jam in the middle. Instead of jam we used a mixture of butter cream and jam. Then the orange liqueur butter cream went on top and we topped it off with a thin layer of almond past. We needed to freeze the cake so we can cut them in squares later. After they were frozen we cut them in bite size pieces. Then it went back in the freezer since they have to be frozen for the fondant dip. Basically we heated up some fondant with some water so it was a bit runny and we dipped the top of the cakes in and place them in cupcake baking cups so we could decorate them later.
Then we made the batter for the macarons using:
- 100 gr powdered sugar 300 gr powdered sugar
- 100 gr almond flour 300 gr almond flour
- 40 gr egg white + 40 gr egg white 120 gr egg white + 120 gr egg white
- 100 gr sugar 300 gr sugar
- 40 gr water 120 gr water
- color paste (optional)
oven temperature 140C
We started with sifting the almond flour and threw out all the bigger pieces. Then we added more almond flour to the batch making it 100 grams. Then we mixed it together with the powdered sugar. This mixture is called "broyage" and it's just a mixture of 50% almond flour and 50% powdered sugar.
Then it was time to make the meringue. We cooked the sugar in some water till 121C. When the sugar syrup reaches about 115C it was time to mix 40 grams of egg white to soft peeks. Then we added the sugar syrup and mixed it till the bowl is no longer hot.
The other 40 grams of egg white was mixed with the broyage mixture and some food color. To this we added a bit of the meringue to loosen it up a bit and then we fold in the rest of the meringue. Now here comes the tricky part, when do you know if you fold everything in just right? If you mix it to much the macarons will be flat or crack. I guess this is something that needs a bit of practice to see when the mixtures is just right.
We poured the macaron mixture in a piping bag and started to pipe little circles. As we piped the macarons too close we ended up with some twin, tripled and even quadruplet macarons. Next time we will make sure we give them enough space.
As the macarons have to dry out a bit we had time to work on our petit fours. The macarons were ready for the oven when the top has dried a bit so it doesn't stick on your fingers when touching them. We baked them for about 17-19 minutes. When they cooled we stuffed them with some butter cream and they were ready to be gobbled down.
Next time I will try to make the macarons less sweet or make a slightly sour stuffing so it can balance each other out a bit. As for the petit fours, they were very tasty, but if I would make them again I would make them half the height and more square.
For about 120 macarons you need to triple the recipe. Every oven is different so you need to test it first. Better to have it on a lower then higher temperature and it's not a problem if you bake it too long.
Next class: Rodolph van Veen's Oscar cake: this is a chocolate mouse cake with hazelnuts which he made for the Oscars in 2005.
- 100 gr powdered sugar 300 gr powdered sugar
- 100 gr almond flour 300 gr almond flour
- 40 gr egg white + 40 gr egg white 120 gr egg white + 120 gr egg white
- 100 gr sugar 300 gr sugar
- 40 gr water 120 gr water
- color paste (optional)
oven temperature 140C
We started with sifting the almond flour and threw out all the bigger pieces. Then we added more almond flour to the batch making it 100 grams. Then we mixed it together with the powdered sugar. This mixture is called "broyage" and it's just a mixture of 50% almond flour and 50% powdered sugar.
Then it was time to make the meringue. We cooked the sugar in some water till 121C. When the sugar syrup reaches about 115C it was time to mix 40 grams of egg white to soft peeks. Then we added the sugar syrup and mixed it till the bowl is no longer hot.
The other 40 grams of egg white was mixed with the broyage mixture and some food color. To this we added a bit of the meringue to loosen it up a bit and then we fold in the rest of the meringue. Now here comes the tricky part, when do you know if you fold everything in just right? If you mix it to much the macarons will be flat or crack. I guess this is something that needs a bit of practice to see when the mixtures is just right.
We poured the macaron mixture in a piping bag and started to pipe little circles. As we piped the macarons too close we ended up with some twin, tripled and even quadruplet macarons. Next time we will make sure we give them enough space.
As the macarons have to dry out a bit we had time to work on our petit fours. The macarons were ready for the oven when the top has dried a bit so it doesn't stick on your fingers when touching them. We baked them for about 17-19 minutes. When they cooled we stuffed them with some butter cream and they were ready to be gobbled down.
Next time I will try to make the macarons less sweet or make a slightly sour stuffing so it can balance each other out a bit. As for the petit fours, they were very tasty, but if I would make them again I would make them half the height and more square.
For about 120 macarons you need to triple the recipe. Every oven is different so you need to test it first. Better to have it on a lower then higher temperature and it's not a problem if you bake it too long.
Next class: Rodolph van Veen's Oscar cake: this is a chocolate mouse cake with hazelnuts which he made for the Oscars in 2005.
One person birthday cakes
Last year I treated myself to some great baking tools. I've got a cake stand for decoration cakes, a 60 cm rolling pin, several pipping tips, cupcake baking cups, Christmas baking trays and lots more. But my new to go to toy is definitely this Wilton mini orb cake pan (picture is from taartendecoratie.nl).
One biscuit batter is enough for 12 cakes and one mini cake. And my ice cream scoop scoops just enough batter to fill it so it's a win win for me.
I tested it out with half the biscuit recipe first and I ended up with 8 mini cakes.
So when it was my sisters birthday I used the whole recipe to make everyone an individual birthday cake and of course the birthday girl gets her own slightly bigger cake.
So I started with making the batter for the biscuit. Instead of keeping it plain I added 3-4 tablespoons of grated dried coconut and some vanilla sugar. I baked it for about 15 minutes on 170C.
Then I started making butter cream. To the basic mixture I added 200 gram coconut paste and 1-2 table spoons of Malibu liqueur.
After the cake cooled I sliced them in half and spread a thin layer of apricot jam on one side. On the other side I spread some coconut butter cream. Then I covered it all in coconut butter cream and let it harden in the fridge.
I used 250 grams of white fondant and 125 grams of purple fondant to cover and decorate the cakes. Some of the purple fondant I mixed with the white fondant to get violet colored fondant. I used some cupcake cups to wrap the cakes instead of aluminium foil.
Birthday girl didn't want any cake, but she was sure happy there was some.
One biscuit batter is enough for 12 cakes and one mini cake. And my ice cream scoop scoops just enough batter to fill it so it's a win win for me.
I tested it out with half the biscuit recipe first and I ended up with 8 mini cakes.
So when it was my sisters birthday I used the whole recipe to make everyone an individual birthday cake and of course the birthday girl gets her own slightly bigger cake.
So I started with making the batter for the biscuit. Instead of keeping it plain I added 3-4 tablespoons of grated dried coconut and some vanilla sugar. I baked it for about 15 minutes on 170C.
Then I started making butter cream. To the basic mixture I added 200 gram coconut paste and 1-2 table spoons of Malibu liqueur.
After the cake cooled I sliced them in half and spread a thin layer of apricot jam on one side. On the other side I spread some coconut butter cream. Then I covered it all in coconut butter cream and let it harden in the fridge.
I used 250 grams of white fondant and 125 grams of purple fondant to cover and decorate the cakes. Some of the purple fondant I mixed with the white fondant to get violet colored fondant. I used some cupcake cups to wrap the cakes instead of aluminium foil.
Birthday girl didn't want any cake, but she was sure happy there was some.
Subscribe to:
Posts (Atom)