Showing posts with label chocolate. Show all posts

19 July 2015

Jake and the Never Land Pirates theme cake

My neighbor approached me some weeks ago with the request of making the boys birthday cake. Since their birthday is in the same month they celebrate it together. The party theme was Jake and the Never Land Pirates. I have vaguely heard about this children's tv show, but never actually watch it so I had to look it up. I had no idea what to make but it had to be two cakes so they both can have their own. 
I came across this very cool 3D cake and I decided to go for it and make one for the boys. Two days before the party I started with baking the biscuits first. I started with baking two rectangular chocolate cakes using this biscuit recipe:
- 400 gr eggs
- 200 gr sugar
- 170 gr flour

- 30 gr cocoa powder
- pinch of salt
- lemon zest

oven temperature 170C

Then I baked two vanilla cakes. For the bottom cake I used:
- 300 gr eggs
- 150 gr sugar
- 130 gr flour
- pinch of salt
- lemon zest


And for the top tire I used:
- 200 gr eggs
- 100 gr sugar
- 70 gr flour
- pinch of salt
- lemon zest


While the cakes cooled I made some crème pâtissière using this recipe:
- 750 ml milk
- 150 gr sugar
- 3 egg yolks
- 50 gr custard powder
- vanilla pot/essence/sugar
- pinch of salt


Then the next day I made butter cream I using this recipe:
- 128 gr water
- 338 gr sugar
- 150 gr egg white
- pinch of cream of tartar
- 750 gr room temperature butter in cubes
- 200 gr melted dark chocolate

I put about half aside for crumb coating and to the other half I added some melted chocolate.

Because there wasn't enough I had to make  more:
- 85 gr water
- 225 gr sugar
- 100 gr egg white
- pinch of cream of tartar
- 500 gr room temperature butter in cubes

- handful small diced fresh strawberries
After all this mise and place the day before it was time to put the cake together. I started with the 3D boat first. I wanted to recreate Bucky, Jake's boat. I found a template online, but this boat wouldn't be big enough for 40 people so I carved the boat shape myself. I started with one, then put it on top of the other and carved out the second one. One sheet of biscuit would be the bottom, the other one will be used to shape the boat in height. Since the bottom was too thick to leave it like that and it was actually a bit too thin to fill it, I carefully slice it in half. I  sprayed it with some sugar syrup, spread some raspberry jam and crème pâtissière on it and on the other half I spread the chocolate butter cream.

Where possible I would fill the cake. On some places filling it would make it less stable so I would just use some butter cream. After that I crumble coated the cake and put it in the fridge. 

Then it was time for the two tire cake. I started with cutting them in three parts. After spraying all the parts with some sugar syrup I spread some raspberry jam and when I run out of that I used apricot jam. The next layer would be some very thinly slice fresh strawberrys, some crème pâtissière and I ended up with strawberry butter cream. I kept doing this till all three layers were filled. These cakes also went into the fridge. 
Now I had time to do some modeling. I wanted to see if I could make Jake from fondant. And I also like Skully, the parrot. For both I found a video which I watched over and over until I could get it right. Jake was very tricky to make since he has lots of parts. Since it took me so much time to make it, I skipped some miner details. Skully was slightly easier to make, but again I had to skip on some details. Both turned out pretty cool. As I didn't had any green fondant, I made a blue and a purple parrot. Since they didn't had the right color I decided to make them Skully's friends. After I had green fondant, I of course made the "real" Skully. 

By this time the cakes were ready to be coated with fondant. For Bucky I used a kilo chocolate fondant (Satin Ice) which was very easy to work with, mixed with one kilo marshmallow fondant. This was too much, I think I ended up only using one kilo. I made the railing, the slight, the windows, the door, the ladder and used yellow fondant for outlining the boat. I also added the number 3 and 5 since that was the boys age.
For the bottom layer of the two tire cake I used some blue fondant. I didn't know what I wanted to make, but since it's a pirate theme cake I thought about making something with and ocean theme. Then I made some waves with different shades of blue. 

Since I still had lots of chocolate fondant left I used some for the top layer as well. No idea what to make there, but I would figure it out on the fly. 
I also carved out two swords (the one Jake uses) and thought I might use them as decoration.
On the day of the party I had all morning to figure out what I wanted to do with the two tire cake. I also had time to add some details on Bucky. Since I had so much room on the back of the boat I added one boy's name. There was no more room for another name so his brother's name went in front of the boat, of course on the side of his age.

I've seen some really fun cakes with octopuses so I wanted to make some also. I made the first one so fast and it was so much fun I decided to make two more. I put the bigger octopus on the boat to cover the seams and to make it more fun I punch out some golden and silver "coins" and sprinkled that around the octopus. Now it seems like he's been dragging or stealing the money.
The other two octopuses went on the bottom of the two tire cake. Also surrounded by coins of course. Then I wanted to make two Skullys. One would be in front of the ship and the other one will be used on the bottom of the two tire cake. They would be different in size as well. The one on the ship is slightly bigger.
To make the ocean more alive I added some coral and some seaweed. At first Skully was on a big raft, but I found out that I didn't had enough room for my second layer so he had to move to a much smaller raft. 
By the time I got to the top layer I didn't had much inspiration. I didn't want to make it to busy since the bottom layer was already very vibrant. I used some chocolate fondant to make wooden planks and used it to surround the cake. I placed the two parrots on top and surround them with golden coins making them guarding the money. Then with Jake's colors (red and white) I made a banner. 
Last minute I decided to turn Skully's friends into pirates as well by giving them a pirate bandanna. I also made tiny tiny little skulls, just like Skully's bandanna. Gotta love the details. 
After I placed this cake on top of the ocean cake I had to make room for Skully. He's now on a very tiny raft with just a bottle to keep him company. 
These cakes were a 3 days project (without much eating or resting) but it was lots of fun. And very satisfying seeing the reaction of the birthday boys and their guests. 

12 July 2015

Raspberry and chocolate dessert

Today we were making a raspberry bavarois with an interieur of raspberry cremeux and a cookie bottom and a chocolate mousse with a chocolate cremeux with a chocolate cake bottom. All things we made before except for the cremeux. 

We started with making the chocolate cremeux since we had to freeze it in a mold first before we could use it in our final product. For the cremeux we used:
- 240 gr milk
- 360 gr whipping cream
- 95 gr egg yolk
- 55 gr sugar
- 7 gr gelatin powder (soaked in 35 gr water)
- 75 gr cream cheese
- 180 gr melted dark chocolate

We started with cooking the milk and cream. In the meantime we mixed the egg yolks with the sugar. Slowly we incorporated the warm milk/cream mixture with the eggs and poured it back in the pot so we could cook it for a few minutes on 82C to bind the mixture. We heated up the gelatin so it liquefies and added that to the thickened mixture. Last we stirred in the cream cheese and the dark chocolate. We poured the cremeux in the molds and put them in the freezer. 

Then it was time for the raspberry cremeux. For this we used:
- 350 gr raspberry puree
- 120 gr egg yolk
- 120 gr sugar
- 5 gr gelatin (soaked in 25 gr water)
- 100 butter

We cooked the raspberry puree with half of the sugar. To this we added the gelatin which we heated up till it was liquid. The other half of the sugar was mixed with the egg yolk. We heated this egg mixture in a double boiler for about 5 minutes on 85C. Then we mixed in the butter and when that melted we added the raspberry puree. This cremeux also went into molds and in the freezer. 

As there were two different bottoms to make we each made one. I made the cookie bottom using the recipe for "bretonsdeeg". However I didn't exactly followed the recipe, but made a slight adjustment. I used:
- 150 gr butter
- 120 gr sugar (basterdsuiker)
- 1,5 gr sugar
- 20 gr egg (1 whole egg)
- 6 gr baking powder 
- 1,5 gr carbon dioxide powder 
- 200 gr flour
- 30 gr almond flour
oven temperature 180C

I mixed all the ingredients together, pressed the dough in a mold and baked it till it was golden brown. 

My partner made a chocolate biscuit using:
- 260 gr egg yolks
- 140 gr sugar
- 90 gr almond flour
- 60 gr flour
- 55 gr cocoa powder
- 260 gr egg whites
-140 gr sugar
- 70 gr butter
oven temperature 220C

First he mixed the egg yolks with 140 grams of sugar and the almonds. Then he whisked the egg whites with 140 grams of sugar till soft peeks. In the meantime he melted the butter and let that cool for a bit. He folded the egg yolks with the almond and sugar in the egg whites, sift the flour with the cocoa powder and mixed that in. Last he added the melted butter. He spread this mixture on a baking tray and baked it till the cake was done. After the cake cooled we used a cooking cutter to cut the shape we needed for our molds.

After the cake and cookie cooled it was time for the chocolate mousse. This mousse recipe is slightly different then what we used before. This time we used a creme patisiere, which was already prepared for us:
- 170 gr milk
- 170 gr creme patissiere
- 170 gr dark chocolate
- 8 gr gelatin (soaked in 40 gr water)
- 15 gr cocoa powder
- 400 gr whipping cream

We mixed half of the milk with the cocoa powder and the other half we brought to a boil. To this we added the chocolate, the creme patissiere and the cocoa mixture. We melted the gelatin and added this also. While this mixture cools we whisked the whipping cream till it has the same texture as yogurt. We slowly incorporate the chocolate mixture with the whipping cream, poured it in a piping bag and filled our molds halfway. Then we added the chocolate cremeux in the middle, covered it with some more chocolate mousse and covered it with a piece of chocolate biscuit. Then we put it back in the freezer so it would be easier for us to take it out of the mold and to dip it in a glaze. 

For the raspberry bavarois we used:
- 300 gr raspberry puree
- 7 gr gelatin (soaked in 35 gr water)
- 360 gr whipping cream

We melted the gelatin and added this to the raspberry puree. Then we whipped the whipping cream till it has a yogurt consistency and folded the puree in. We piped half of the bavarois in a mold added the raspberry cremeux and covered it with some more bavarois. We topped it with a cookie and placed it in the freezer. 

Since we had to wait for the desserts to freeze we had time to make some chocolate decorations. 

The glaze was pre-made for the whole class and I think it didn't went the way it should. 
When we dipped in our chocolate and raspberry desserts the glaze just dripped right off. At first we thought it was because the glaze was too hot, but if done right, it should stick on the dessert and give it a nice coating. 

Although the desserts didn't look the way they should, the flavor was good. However next time I would coat it in chocolate. I think that will look much better then this raspberry coating.


30 May 2015

Schwarzwalder birthday cake

For my moms birthday I wanted to make something nice. For my dad's birthday I made the Oscar cake with an extra layer of panna cotta on the inside. Just to give it a different twist. Initially I wanted to make the same for my mom's birthday, but when I looked online I stumbled on this schwarzwalder cake made by Rudolph van Veen. I knew this had to make this cake. 
First I started with watching the video in which Rudolph shows how to make the cake. Then I went to the store to get the rest of the ingredients I needed.  

After that it was baking time. 

I started with making the cookie dough since this has to be chilled for a bit. This recipe was quite straight forward and all I needed was:
- 300 gr flour
- 200 gr butter
- 100 gr sugar
- 1 egg
oven temperature 180C

I put all the ingredients in a bowl and kneed them till it forms a dough. This dough I put in the fridge to chill.

After that I stared on the chocolate biscuit:
- 250 gr dark chocolate
- 125 gr butter
- 3 eggs separated in yolks and whites
- 125 gr brown sugar
- 80 gr self rising flour
- 50 gr almond powder
oven temperature 200C

I started with melting the chocolate and the butter on a double boiler. Then I whisked the egg yolks with some sugar till fluffy and mixed this into the chocolate. I carefully incorporated the flour and the almond powder in the chocolate mixture. In the meantime I mixed the egg whites with the rest of the sugar till fluffy. To this I incorporated the chocolate and spread the mixture out on a baking tray. I baked it for about 15-20 minutes till the biscuit was fully baked and let it cool.

This recipe was too much for my baking tray resulting in a thick layer of chocolate biscuit. Next time I would half the recipe and half the banking time.

While the biscuit was baking I took the cookie dough out of the fridge and put it in my baking pan. As I didn't want to waste any dough or do anything else with it, my cookie layer was a bit thicker then the recipe called for. Next time I would just half the cookie recipe. I baked the cookie till it was golden. I think it took about 30-40 minutes because it was a thick slice. This also had to be cooled.
For the cherry stuffing I needed:
- 200 ml whipping cream
- 1 tablespoon of sugar
- 130 gr cherries in a jar
- 1 gelatin sheet soaked in water

Because I had more cherries (and again didn't want the rest to go to waste) I doubled the recipe. I made the cherry stuffing twice since the first time the whipped cream didn't turn out the way I wanted to. What I did was whipping up the whipped cream with the sugar, heating up some of the cherry juice, to this I added the cherries and the gelatin and this all I mixed into the whipped cream. As it had to much juice the cream started to curdle and I had to through it all away. 

The second time I added the cherries (without the juice) to the whipped cream first and then slowly incorporated the juice. This gave a slightly better result. Next time I will wait till the gelatin has firm up the cherries and juice mixture first and then incorporate the whole thing with the whipped cream. 
Now it was time to ensemble the interior of the cake. I used a cutter to cut out 3 circles of the chocolate biscuit. As my baking tray was too small I could only get 2 whole circles and 2 half circles. I started with a layer of one whole circle of chocolate biscuit in the cutter. On this I sprinkled some amaretto liquor and I spread a layer of cherry whipped cream. I topped it with another layer of chocolate biscuit. Again another dash of liquor and a layer of cherry whipped cream and I finished with the two half circle of biscuit. Next time I would just use the two half circles for the middle layer, but I didn't know if I would have enough cherry whipped cream so I wanted to use the whole circles first, just in case. 

I placed the cookie on the interior and used a bigger cutter for the outside rim. This rim will be filled with chocolate mouse using this recipe:
- 110 ml milk (I didn't had milk so I used whipping cream instead, which worked just fine)
- 2 egg yolks
- 30 gr sugar
- 180 gr chopped pure chocolate
- 375 gr whipping cream

Actually I used this recipe times 1,5 since I didn't want to end up with not enough mouse. And luckily I did, because I didn't end up with much after using it all. 

I started with heating the milk or in my case the whipping cream. In the meantime I mixed the sugar in the egg yolks and to this I add a splash of warm whipping cream to avoid lumps. The egg mixture went into the rest of the warm whipping cream till the mixture was as thick as custard. Then I took the pan of the stove and mixed in the chocolate. While this mixture cools I started with whipping up the rest of the whipping cream. I poured the chocolate mixture into the whipped cream and mixed it till the chocolate is fully incorporated. I poured the mouse in a zip lock bag and after I took the cutter off my chocolate biscuit I piped the mousse all around the interior. Unfortunately my interior was slightly higher then the outer rim so my cake looked slightly different then the original. After everything was covered with the mouse I put the cake in the freezer.

The next day I made the chocolate glaze using the same recipe as the one from the Oscar cake"
- 280 ml water
- 360 gr sugar
- 260 gr whipping cream
- 120 gr cocoa powder ( I only had 100 gr, which also worked)
- 6 gelatin sheets soaked in water

I put all the ingredients in a pan and cooked it till it was ready. Then I added the gelatin and let it cool till about 40C.
I took the cake out of the freezer and start pouring the glaze all over starting with the rim. After the cake was covered I put it on a cake stand and held it on my lap while we drove to my mom's. Although it was an hour drive the cake was still frozen when she tried to cut it. I guess with a cake this big it needs at least two or three hours to defrost. The rest of the family couldn't wait so they digged in. Frozen or not it was a great birthday cake. Normally I would test a recipe first before making it for "real" so for a first timer it wasn't bad at all. Next time it would be much easier and faster to make this cake and I'm sure I will be making lots of them. It was that good!

13 February 2015

Blondies vs Brownies

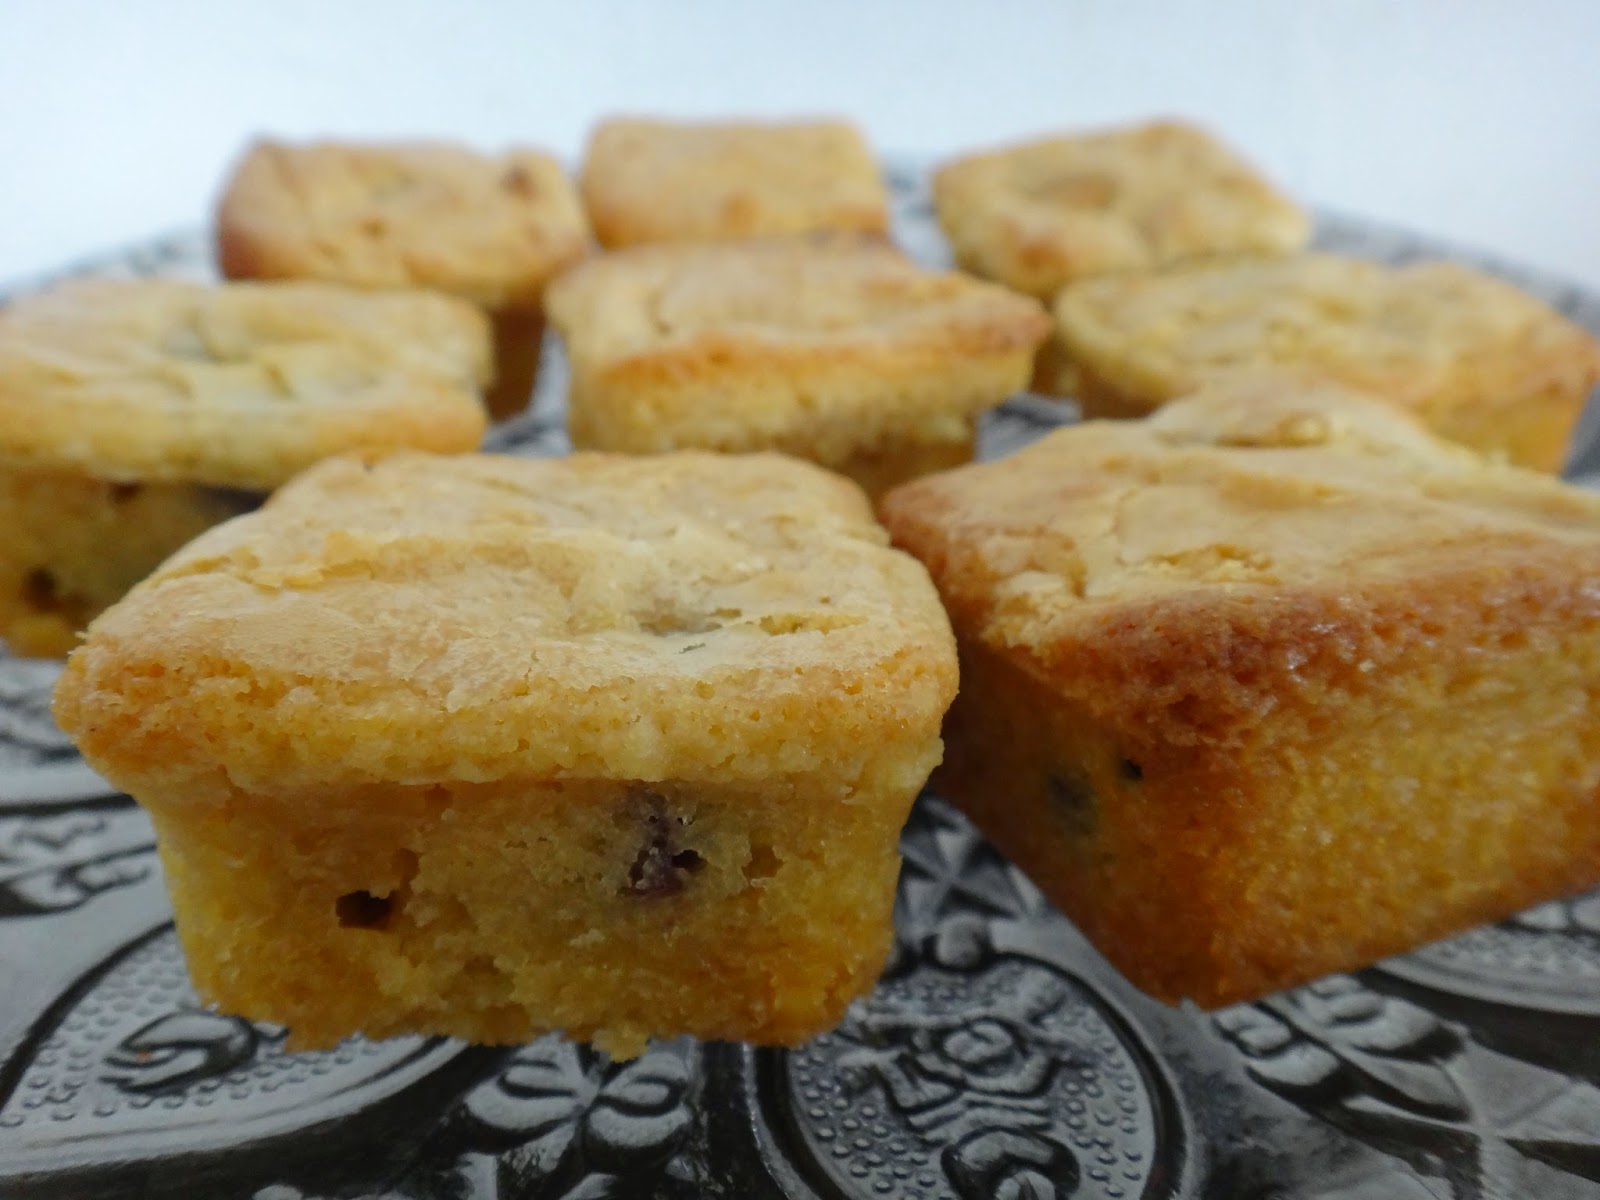
It's been a while since I made blondies and brownies so for my friends birthday I decided to make both and pack it in a cute box. 

For the blondies I used:
- 200 gr light brown sugar
- 200 gr room temperature butter
- 200 gr chopped white chocolate
- 175 gr eggs (about 3 large ones)
- 200 gr flour
- pinch of salt
- vanilla sugar 
- 125 dried cranberries 
oven temperature 170C

I started with melting the butter and to that I added about 50 grams of chopped white chocolate.

Then I mixed the sugar with the eggs till it was creamy and I mixed in the rest of the ingredients, cranberries last.

Since I have this nice brownie mold I brushed it with some melted butter and scooped some of the blondie mixture in.
I baked them for about 25 minutes, more or less and they came out perfect. The cranberries gave it a nice extra touch.

For the brownie I used:
- 200 gr melted butter
- 300 gr dark chocolate
- 280 gr flour
- pinch of salt
- 2 eggs
- 180 gr sugar
- vanilla sugar
- 2 teaspoons of instant coffee
- 100 gr chopped walnuts
oven temperature 170C

First I melted the butter with the dark chocolate. Then in a different bowl I mixed the eggs, the sugar, vanilla sugar and the instant coffee. To this I added the melted chocolate and mixed in the flour and salt. Last the walnuts were added.
I baked them for about 25 minutes and they were kinda overdone. Still had lots of flavor but not as chewy as they should be. I think 15-20 minutes would be better.

25 January 2015

Oscar cake by Rudolph van Veen

At the end of last weeks class we were told that we would recreate this cake made up by Rudolph van Veen (a well known Dutch chef and patissier) for the Oscars in 2005 hence the name Oscar cake. We would only get the recipe and had to figure the rest out ourselves. Luckily we could watch Rudolph make the cake online so the smart ones (like me hahah) did that. I even went beyond that by testing the recipe at home first.
His recipe was for 2 cakes, but since I'm just testing the recipe I only used half the recipe. As this cake is build up in layers the recipe will be as well.

For the almond cake layer I used:
- 58 gr almonds
- 58 gr sugar
- 75 gr eggs
- 50 gr egg white
- 7 gr sugar
- 10 gr melted butter
- 12 gr flour
oven temperature 220C

First I grounded 58 grams of almonds with 58 grams of sugar. Then I beat the egg white with 7 grams of sugar till it had soft peeks. To the almond mixture I added the eggs, the melted butter and the flour and fold this into the egg whites.

I spread the mixture on some baking paper and baked it in the oven for 10-12 minutes. After that I took it off the baking tray, pulled the baking paper off and let it cool.

For the coffee syrup I used equal part of coffee and sugar and added a dash or two coffee liqueur. 

The original recipe called for 1 cup of coffee and 1 cup of sugar, but this is way to much for this recipe so I made just enough to dip the almond cake in.

For the caramelized hazelnuts I used:
- 25 gr sugar
- 15 gr butter
- 50 gr hazelnuts

If you heat the sugar and the butter on low temperature you can put both in a pot at the same time. When the mixture has a caramel color you can add the hazelnuts. If you melt the butter first and then add the sugar you will not be able to mix it all together for a nice caramel so the proper way to do it is to melt the sugar first. When that browns add the butter and mix it before you add the hazelnuts. 
I poured this mixture on some baking paper to let it cool. When it cooled I chopped them in rough pieces.

For the cake I used 4 cake molds of 9 cm and there was enough left for 2 smaller cakes, which I don't know the size of. 

With the cake molds I pressed out the bottom of the almond cake and a smaller piece for in the middle. Both pieces of cake were then brushed with the coffee syrup. On the bottom I sprinkled some chopped caramelized hazelnuts.

Now for the chocolate mousse layer I used:
- 63 gr water
- 63 gr sugar
- 125 gr pure chocolate
- 75 gr egg yolk
- 3 sheets of gelatin soaked in water
- 450 gr whipping cream whipped to soft peeks

In the movie Rudolph just boiled the water and sugar and added that to the egg yolk whisking it till it was fluffy. So that's what I did at home and it worked somewhat ok. 

In class we were told to heat the water and sugar till 121C and then added it to the yolk. The first time we did it,we tried to whisk it by hand but the sugar clumped together so it didn't work. The second time we used the stand mixer and slowly added the syrup which resulted in a very fluffy mixture. However we didn't heat the syrup to 121C. I think it was only a bit higher then 100C.

Then I melted the chocolate and melted the gelatin sheets. To the egg mixture I mixed in the chocolate, the gelatin and fold this into the whipped cream.
I filled half the cake molds with the mouse, put a layer of almond cake in the middle and filled it up till the rim. After I did this with all the molds I put them in the freezer. The cakes will have to be frozen when I pour the chocolate glaze on. With bigger cakes it can take a whole day, but since I made small ones, it only took a couple of hours.

For the chocolate glaze I used:
- 140 gr water
- 180 gr sugar
- 130 gr whipping cream
- 60 gr cocoa powder
- 3 sheets of gelatin soaked in water

In a pan I put all the ingredients (except for the gelatin) and let the mixture cook for about 10 minutes. It is ready when the back of your spoon is well coated. Then I added the gelatin and mixed it well so the gelatin dissolves. This mixture has to be brought back to around 35-40C before I could pour it over the cakes.

To get an evenly cover it is important to pour the glaze on the edges of the cake and not in the middle. Since the cakes are frozen the glaze will immediately set. 
Then it is possible to decorate the cake with whatever you want, but since I want the decoration to match the inside of the cake I used some grounded caramelized hazelnuts. It's also a good way of masking the rough edges on the bottom of the cake. 

It was a great experience making this cake. I have all kinds of idea's on how to make a spin off using these techniques. But first I have to come up with 4 different kinds of friandises for next class.

15 January 2015

Retro birthday cake

I love it when people ask me to make something and don't give me any instructions what so ever on flavor or decoration. I get to make whatever I feel like making.
And this is what I felt like making. Although my sister only asked for one cake to me it didn't feel like a party with only just one cake so I decided to make a two layered one.

I wanted to make the top layer with chocolate biscuit and fill it with some chocolate butter cream, raspberry jam and ganache and the second layer would be an orange biscuit with an orange curd, apricot jam and some "bokkenpootjes" butter cream.


I started with baking the biscuit for the two cakes using 1,5 of the biscuit recipe. For the first batter I added quite some cocoa powder. I didn't know that normally you would substitute 10% of the flour with cocoa powder so I added about 3-4 tablespoons of cocoa powder. It turned out just fine so no worries.

For the second layer I added some orange zest to the batter. 

Then when the cakes were cooling down I started to make the first batch of butter cream. For the chocolate butter cream I added 200 grams of melted pure chocolate to the basic butter cream. For the ganache I used equal parts of whipping cream and chocolate. For the sugar syrup I used equal parts of water and sugar and I added a dash of amaretto liqueur. 


I made the orange curd the day before using my lemon curd recipe:

- 300 ml fresh orange juice
- 1 teaspoon orange zest
- 2 eggs
- 2 egg yolks
- 100 gr room temperature butter
- 100 sugar
- pinch of salt

Unfortunately the curd wasn't as smooth as I hoped. So I poured the mixture back in the pot and heat it all up again. Then I added 2 tablespoons of custard powder and let it cook for a couple of minutes. So instead of orange curd I ended up with some orange crème pâtissière which was even better. 


The second batter of butter cream I mixed 1/3 with some crushed bokkenpootjes and to 2/3 I added 3-4 tablespoons of orange crème pâtissière.


When the cakes cooled down I cut them in 3 layers each. Each layer of the cake got sprinkled with some sugar/amaretto syrup to keep them moist. 


The first layer on the chocolate cake was raspberry jam. And on top of that a thin layer of chocolate butter cream. Then the next layer was chocolate ganache and a thin layer of chocolate butter cream. Then the whole cake was covered in chocolate butter cream. 


The orange cake had a first layer of thinly spread apricot jam, orange crème pâtissière and a thin layer of orange butter cream. The next layer was a thin layer of orange crème pâtissière and some bokkenpootjes butter cream. Then the whole cake was covered in orange butter cream. Both cakes went into the fridge till the butter cream was hard. 

I used 1 kilo of white marshmallow fondant and 250 gram of purple fondant for the decoration. For the top cake I didn't had a paper cake bottom as it would be stacked on top of the other cake, but next time I would use one. It will keep the two part separated while cutting the cake. 
Both cakes were transported separately and stacked together on site. Too bad the light was horrible for the last picture, but everyone loved the cake!

09 November 2014

Chocolate show piece

For the end of the chocolate phase we had to make our own chocolate show piece. I was so very exited for this class I couldn't even sleep the day before. So many ideas in my head of what I wanted to make and how I would make it. 

It all stared with an idea. At first my team mate and I were suppose to make something that would match together, like Ying and Yang. So we both could make our own piece but when we place it together it would match. I looked online for ideas and instead of Ying and Yang I found earth, wind, water and fire. In this case we both could make two elements and give our own creative touch to it. The weekend before we would work on our show piece and finish it off in class. 

After the class in which we made round shaped chocolate we figured that we could make something in class and finish it the same day. No need to work on it beforehand. We decided to each make our own piece, not matching this time. 


I wanted to make a beehive with some bees. I looked everywhere for a beehive shaped mold or vase so I could make my own mold, but there was nothing I could use. Then I figured I could make my own beehive by using something round and then make the circles around it. 
I broke my freaky mask in pieces and reused the chocolate to make this beehive shape. Unfortunately a piece broke off when I took the chocolate out so I decided to make the door a bit bigger so you can see the inside of the beehive.
I also found a game with some round pieces so I used them to make the bee bodies.

Then on a piece of paper I had some circles and I tried to pipe the chocolate in that shape. I wanted to use the circles on the outside of the beehive, but it didn't work out. The circles didn't fit and they weren't evenly piped either. I melted the chocolate again and this time piped it directly on the beehive. 
I started with the bottom and unfortunately the chocolate was still too runny. 
So I tried it on the top and that held its shape a bit better. So I worked my way down. To mask up my poor piping skills I use the tip of the piping bag to make grooves. 

It took me two hours to make this beehive so I was very happy to make this at home first so in class I could focus on the details. 

As usual I didn't had a detailed plan of what I was making. All I thought about was making a beehive with some bees. And maybe a Christmas tree and some snowflakes. I wanted to make it snowing inside the beehive. 

In class I first started with make some more bigger bee bodies and the Christmas tree. Because my hubby thinks my beehive looks like a helmet I reshaped the door so it got a bit bigger and rounder on the top.

Then I painted the outside of my beehive yellow. I didn't wanted it yellow yellow, but still see the brown so a light brush with yellow cocoa butter was enough. Then I had to cover the inside of my beehive with some white tempered chocolate to make the honeycomb structure. After I poured the white chocolate in I covered the whole inside with plastic bubble wrap. I had to do it twice because it didn't look as neath as I wanted.

After that I had to make the bottom so the beehive can rest on it. I poured a lot of white chocolate on a sheet and pressed the bubble wrap on it. To make it all look prettier I paintbrush the honeycomb yellow.
While that set I took my Christmas tree out of the mold. I only need the top part so I broke the rest off. As the tree couldn't stand on itself I made a plateau. Then I decorated the tree with some silver balls and made some presents for under the tree.

Then I put my bees together. I dipped part of the body in some white chocolate and after it dried I heated both halves and pressed them together. After that I painted the whole body yellow. I made wings, eyes and a mouth.
I wanted some bees in the hive and some on top. 
And I wanted to make some ladybugs as well. I found a mold that was just perfect and I borrowed some pink chocolate. I painted the bodies red, gave it a black head, black dots and of course eyes. They were the cutest!

I even had time to make a snowman. But no time for snowflakes. 
To make it all look extra glamorous I dusted the beehive with some cooper dust, just to add the finishing touch.
I had a great time putting it all together and the result is amazing! Who knew I could make something like this only after 3 days of working with chocolate.